


Cultivation expert Read Spear details the construction of an inexpensive two-bucket deep water culture (DWC) system that’s simple, cheap, elegant, low-maintenance and highly effective for achieving explosive plant growth.
Equipment List
Procure the items in the above list and do not substitute.
TWO BUCKETS ARE BETTER THAN ONE
A Deep Water Culture (DWC) hydroponic system grows plants in mesh pots, without a medium, and roots are fed from below by a nutrient-rich oxygenated solution. Most DWC systems use only one bucket, this one has been designed so that there is an extra bucket to ease the feeding process. There are several advantages to this. First, your plant is going to get big and heavy, and it is going to be pushing against your ScrOG (“screen of green”) — style screen, creating yet more downward pressure. You don’t want to have to lift the net pot off to the side every time you need to add nutrients or water. Also, the root-ball is going to fill the bucket and displace most of the water inside it. With the two-bucket system, you just lift the lid off the non-plant bucket and make your additions and adjustments there.
This additional reservoir will also ensure that you can leave for a few days without harming the plant. I have found that it’s possible to leave it for up to seven days in full bloom and expect a healthy, happy plant when you return. (If you do this, remember that the ppm is going to increase over that time, as the plant takes up water faster than food, so you should start with around 800 ppm if you want to come back to 1,200 ppm—otherwise, you could end up with some leaf burn.)
ROOTING AND FEEDING
First, assemble your two-bucket dWc hydro system according to the step-by-step instructions above. then, you are going to want to take a clone that has been rooted in a 4″ x 4″ rockwool cube and insert it into the system. Simply remove the plastic wrap from around your cube, drop your plant into the net pot and fill in the gaps with loose rockwool. the objective here is not to pack the roots in, but just to close the gap around the top with enough rockwool to block light that would otherwise fall on the roots. roots exposed to light will develop chloroplasts, which are a waste of plant energy as well as a waste of good root area. Next, fill your dWc bucket system up with nutrients through the top of the second, lidded bucket until the nutrient line in the first bucket sits just below the net pot. You don’t want the net pot in the nutri- ent; you want it just above.
Put a mark on the lidded bucket at this level to make future refilling easier. thread the blue hose through the net pot and out the top so you can get a good seal between the net pot and the bucket. Put your airstone on the end of the blue tubing. the airstone should rest on the bottom of the bucket. Attach the other end of the blue tubing to your air pump. When you turn the pump on the air should bubble out of the airstone. Now, when you send air through the airstone and the tiny bubbles pop at the surface, little droplets of nutrient will land on the root-ball.
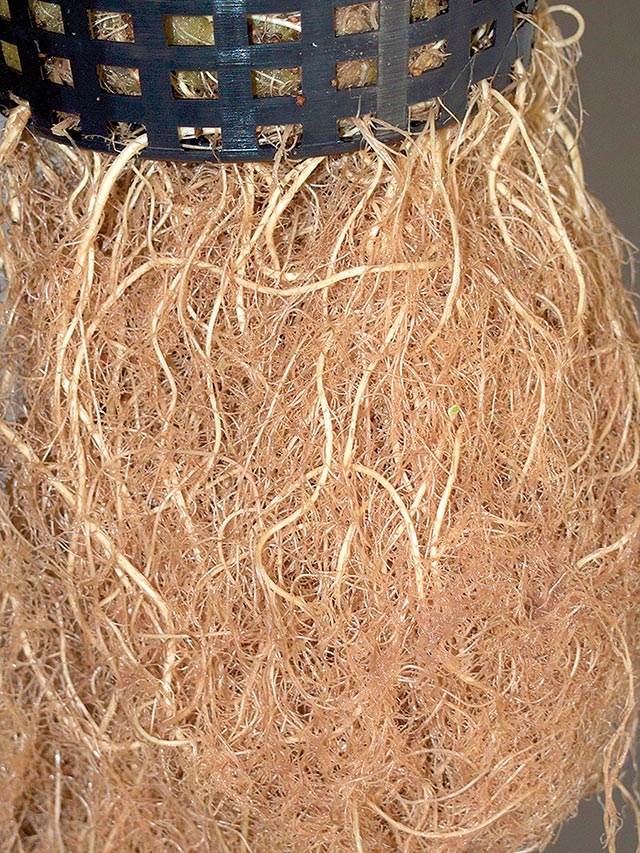
In a few days, the roots will begin to grow down into the nutrient. Soon the root-ball will become impressively voluminous.
Because the two buckets are connected by a small pipe, you will need to be careful with ppm measurements when adding nutrient. the buckets will balance, but it takes several hours for the concentration gradient to equalize. (i let it equalize overnight before taking my final reading.) You are always averaging what you add with what is already there, and there are two variables to consider: concentration and volume. i add 1,000 to 1,100 ppm once the two-bucket system is up and running (having increased concentration incrementally over a period of three to four days), and then i keep an eye on the ppm changes. recall that the plant will use water faster than nutrient, so there will be times when you want to only add water. i find that i never have to exceed 1,200 ppm.
Once your plant is in place, and the bubbles are spraying your roots, it’s your choice as to where you want to grow it or what kind of lights you will use. This is a very malleable system that can be grown in a closet or some other manufactured space. I prefer to use a small grow tent and a 450 w High Pressure Sodium, but metal halides, LEDs or compact fluorescents will do. I think you will be impressed with both the ease of operation of this system and the heavy yields it produces.
1. This is how the hole should be positioned in the bucket.
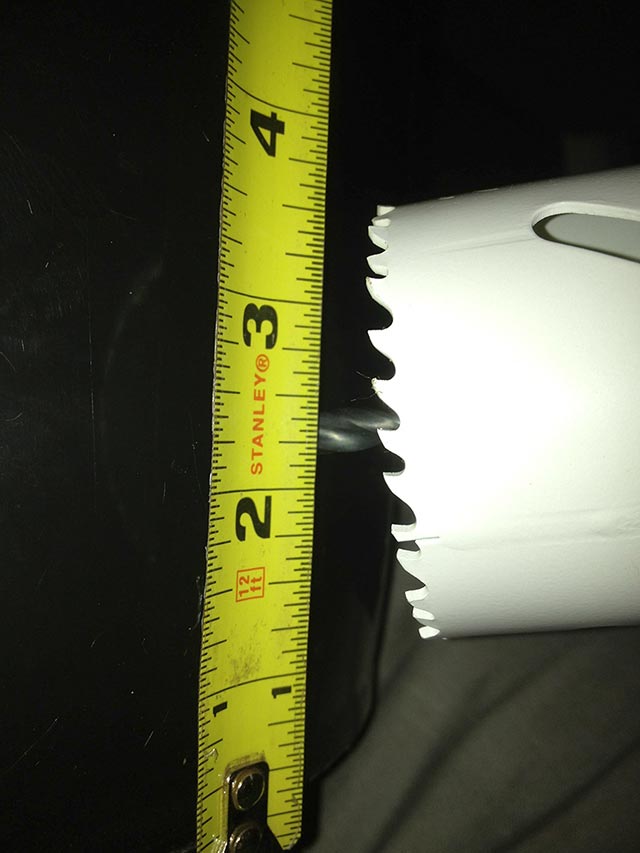
2. Measure up from the bottom of the bucket 2.25″, positioning the guide bit on your hole saw in line with the axis of the bucket handle. Now drill your hole. Try to maintain control of your drill — you want the hole saw to cut, not tear.

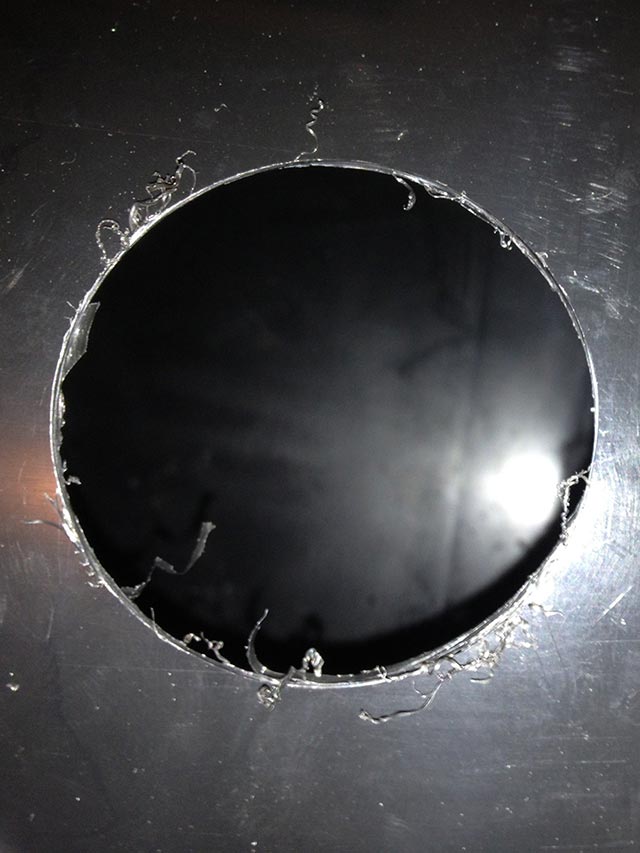
3. Clean the plastic flashing from around the hole.
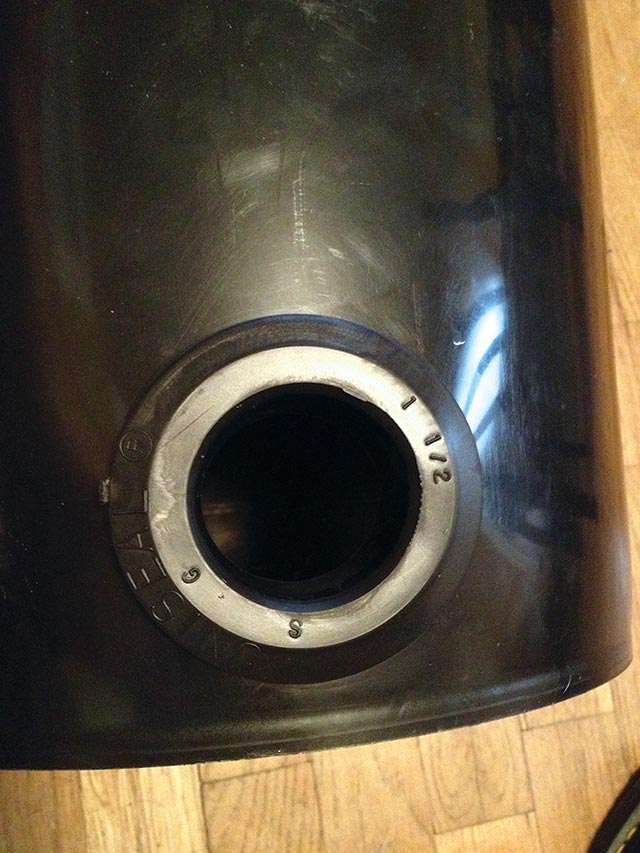
4. Pop in your Uniseal.
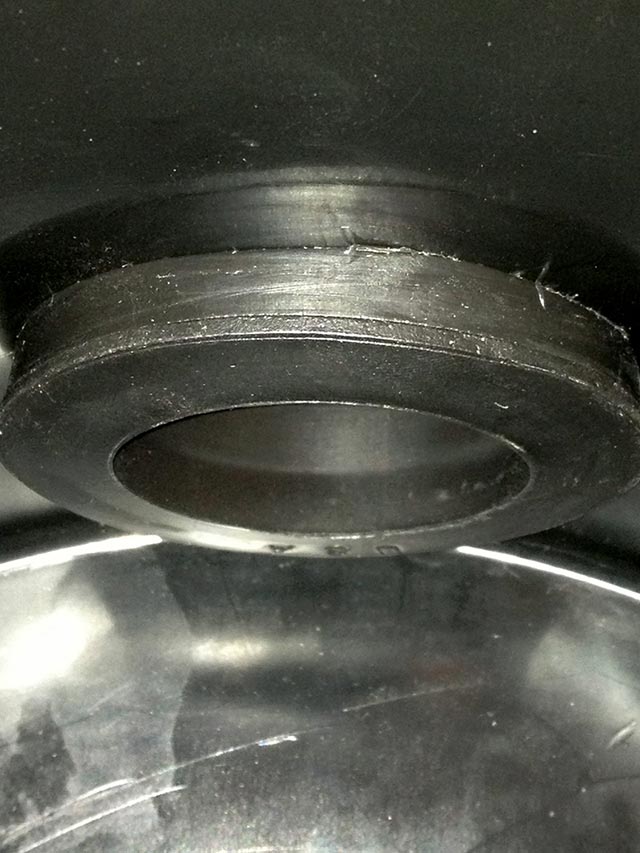
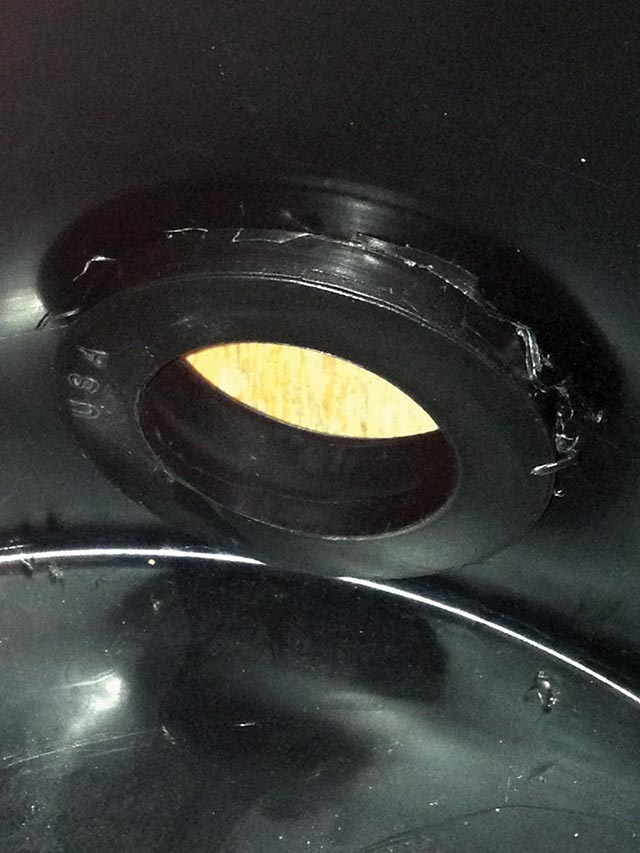
5. A view of the Uniseal from the inside; note how the plastic debris has been cleaned away.
6. This sloppy job will probably leak.
7. Cut a piece of black PVC pipe to 18″. You will now have sharp edges on the PVC.
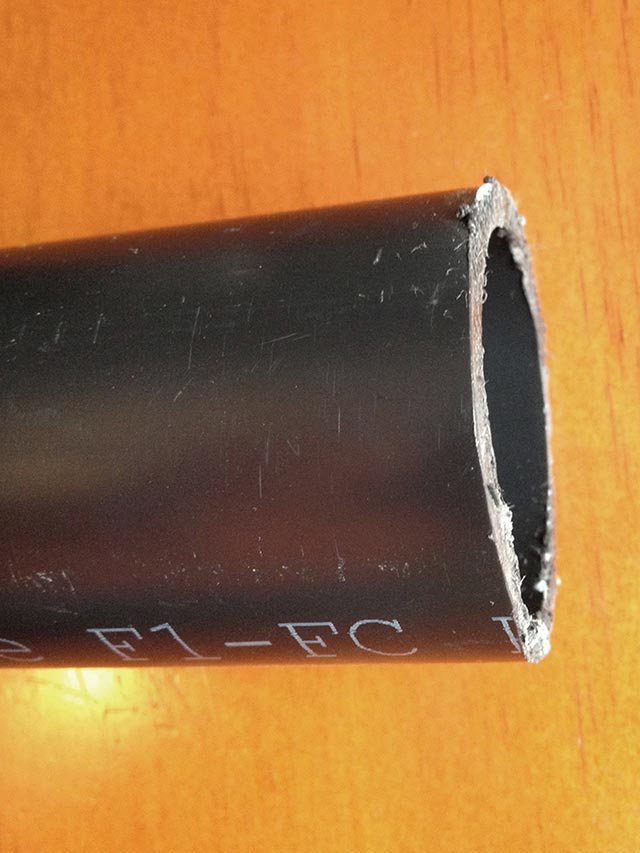
8. Very important: Sand or file those edges round or they will bite into the Uniseal and you will never get the PVC pipe through it.

9. Put some dish soap and water on the PVC and inside the Uniseal to make insertion easier.
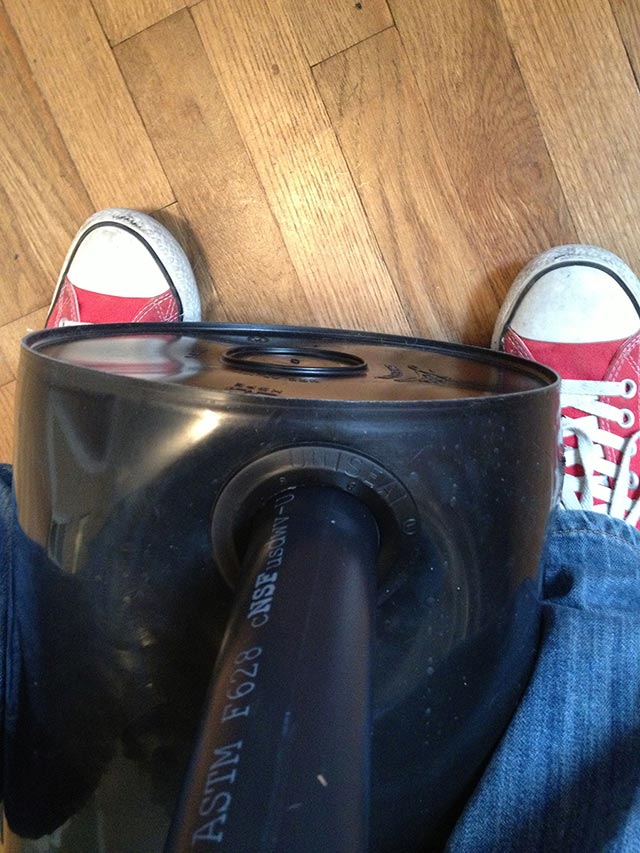
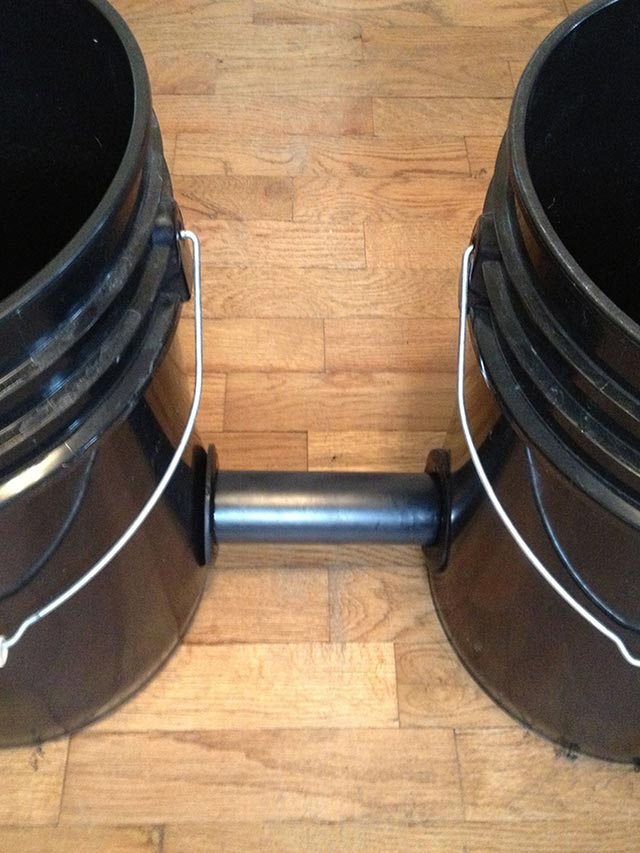
10. Insert the PVC into your second bucket so that the finished product looks like this.
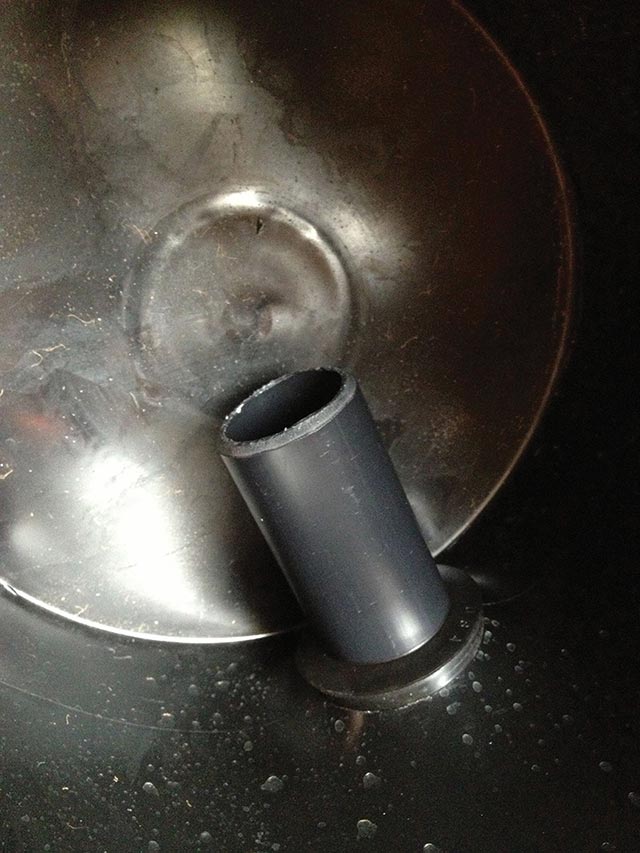
11. Two buckets properly conjoined.
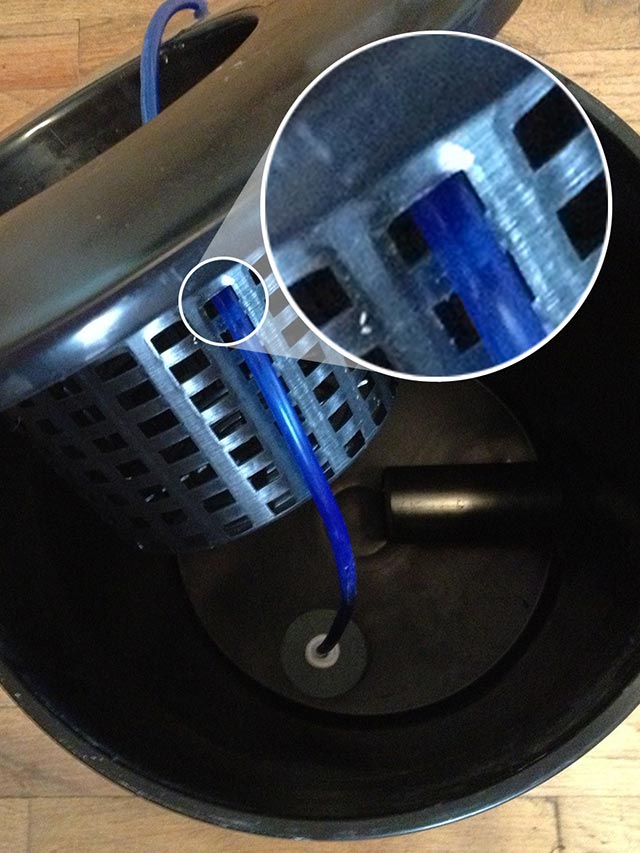
12. Insert blue tubing through the net pot like this. Plug one end of the tubing into your air pump, and the other into the airstone at the bottom of the bucket.
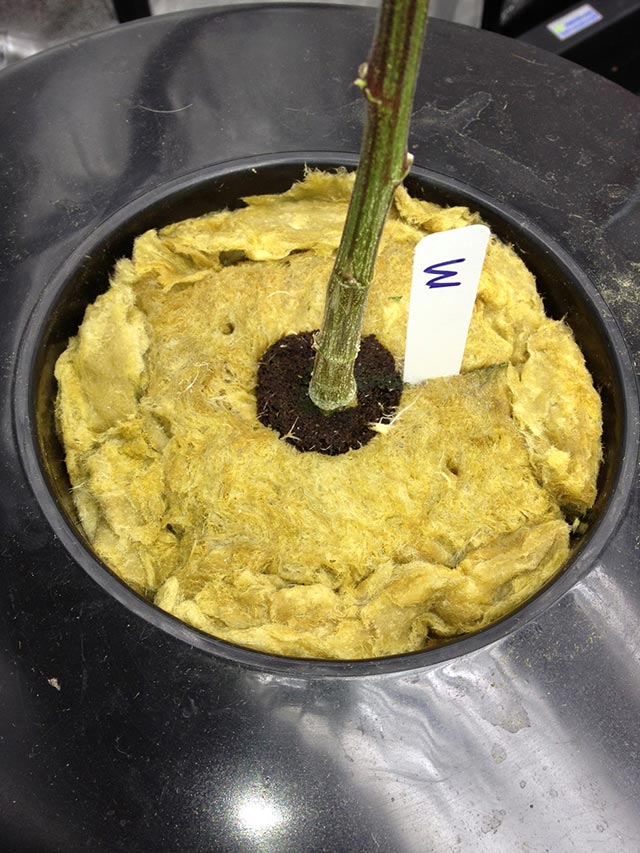
13. A clone ready to transplant into the DWC system.

14. Close up the gaps around the rockwool cube.
15. Roots beginning to grow into the nutrient broth.
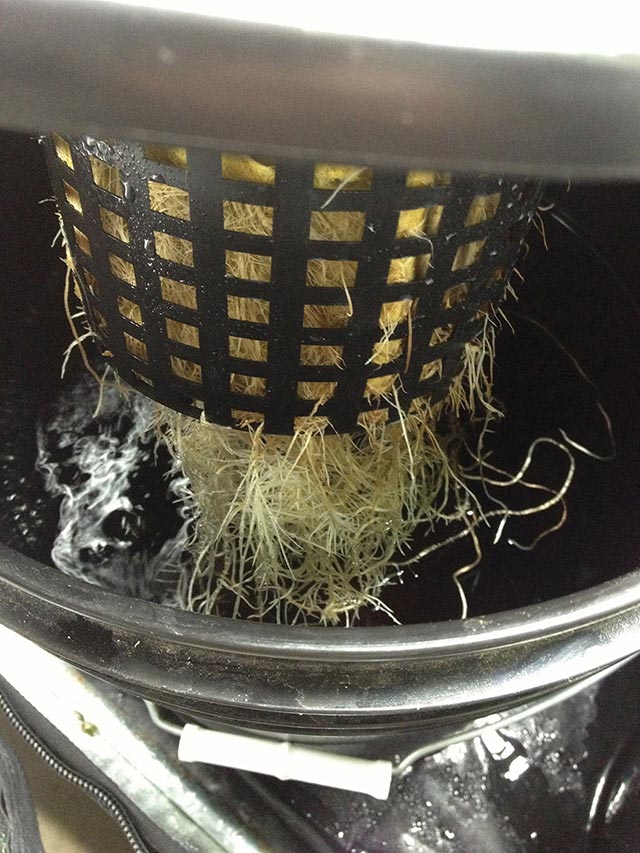
16. The root-ball will fill most of the volume of the first bucket.


Can you add the images it references of making the bucket?
yeah especially when things like ” this is what it should look like”